MagPad Dinner Table

MagPad Dinner Table
Showing posts with label Holidays. Show all posts

Wednesday, November 22, 2023

Let's Talk Turkey

 Do you want a stress-free Thanksgiving Day?  Read on......

I remember a Thanksgiving 30+ years ago.  Scott's sister and their family pulled up as I was taking our Thanksgiving turkey out of the oven.  As I went to carve the meat, a bunch of pink juice came out from the pink meat.  Obviously, the meat wasn't done.  Back into the oven the turkey went, and we ate our meal quite a bit later. 

Fast forward 30+ years and what I've learned from that Thanksgiving Day Disaster. 

The answer to the question:  Do you want a stress-free Thanksgiving Day?  Cook your turkey a day or two before Thanksgiving.  These are pictures of Scott and I yesterday (two days before Thanksgiving).  

I'll let the pictures do the talking.


Pour chicken broth over the turkey, then cover the pan with tin foil, and into the fridge it goes until Thanksgiving day.  Warm it in the oven just before your holiday feast.  
Now the best part...Enjoy your clean kitchen Thanksgiving morning.   
....that is until you start making the potatoes, stuffing, etc. 

Sunday, December 26, 2021

Cinnamon Knots

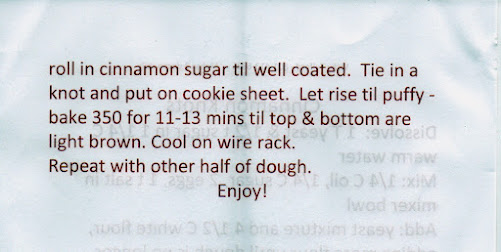
When we attended our Harvest Villas Christmas brunch, my friend Vicky made and brought these delicious cinnamon knots.  
When I tasted one, I asked Vicky if she would teach me how to make them.  
Not only did Vicky teach me, but she taught some of our other neighbors. 
Vicky's talent continues on as my daughter, Rachel and I made some for Christmas morning.
Not too bad, if I say so, myself-- actually delicious!
I think we have ourselves a new Christmas tradition here at the MagPad. 
Merry Christmas! 

Saturday, December 4, 2021

Thanksgiving Veggie Tray

Lisa brought this to her Thanksgiving feast.  
Please pass the turkey, I mean veggies.


Saturday, March 27, 2021

Green Eggs and Ham

Happy St. Patrick’s Day! 
Please pass the green eggs and ham.
My friend, Jen, made this for her family for breakfast on St. Patrick's Day.  It was made with 2 strips of fried bacon for the eyes and a raspberry nose.  She colored the eggs green by adding blue food coloring to the eggs.  Blue food coloring + yellow mixed eggs = green scrambled eggs.    

Saturday, October 31, 2020

Easy Mummy Stromboli

Lisa sent me this recipe from abountifulkitchen.com .  I have cut and pasted different versions of the recipe below.  To get the full explanation on how to make this cute Halloween dinner, I would suggest you click onto the recipe here.  


This is the easy version:  

Here’s what you’ll need for your easy mummy Stromboli: If going the quick and easy route, buy the ingredients listed below and follow the instructions on the recipe for assembly and baking.  For the easy “semi-homemade” version, you’ll need:

  1. Two frozen loaves of Rhodes bread or two pizza crusts refrigerated.
  2. One 12 – 15 oz can or jar of pizza sauce
  3. One 12 oz browned sausage drained and/or 12-16 oz pepperoni and/or ham sliced
  4. About 4 cups grated mozzarella cheese (or a blend of mozzarella, cheddar and provolone)
  5. Black olives for the eyes

WEAVING OR BRAIDING THE MUMMY DOUGH

The mummy is really easy to put together. Simply roll out the dough into a rectangle and the spread the sauce down the middle, top with meats, cheese and then cut both sides into 1/2 inch strips. Then it’s just a matter of alternating the dough back and forth, folding toward the middle to make the mummy pattern. I suggest doing this on the cookie sheet you are using to bake so you don’t have to transfer the mummy after it is filled and formed.

Cut the strips after the dough is filled.  
Weave or criss cross the dough to form the mummy shape. 
This recipe can also be used to make mini mummies!
Each recipe makes about 8 single servings

This is the involved version:

Easy Mummy Stromboli is a fun way to go all-out for your Halloween parties or dinner without taking all day to create festive food! This recipe can be made using prepared ingredients or homemade dough and sauce. If using pre made dough, this recipe takes a little over an hour from start to finish baking!

Prep Time 15 minutes
Cook Time 20 minutes
rising time, cool time 1 hour 30 minutes
Total Time 2 hours 5 minutes
Servings 16
Author Si Foster

Ingredients

Dough

  • 1 tablespoon yeast
  • 1/4 cup warm water
  • 1 teaspoon sugar
  • 4 cups flour I use 2 cups all purpose plus 2 cup bread flour
  • 1/2 cup canola or vegetable oilor olive oil
  • 1/2 cup milk warmed
  • 1/2 cup warm water
  • 1 tablespoon sugar
  • 2 teaspoons sea salt
  • 1 egg beaten if halving the recipe, use one egg

Filling

  • 1 16 oz pepperoni, sliced
  • 1 12-15 oz jar pizza sauce Or homemade sauce below
  • 4-6 cups mozzarella cheese, grated

Home made sauce option

  • 1 14-15 oz jar or can tomato sauce
  • 3 tablespoons tomato paste
  • 1 tablespoon olive oil
  • 2 tablespoons dry Italian seasoning
  • 1 clove minced garlic
  • pinch of sugar
  • salt and pepper to taste

Instructions

Dough:

  1. In a large mixing bowl, mix yeast and 1/4 cup warm water. Sprinkle with 1 teaspoon sugar.
  2. Set aside until yeast begins to bubble.

  3. Add 4 cups flour, oil, warm milk, water, sugar, salt and egg to the bowl.

  4. Mix until all ingredients are incorporated. I use the paddle attachment on my Kitchen Aid for this step.

  5. When all ingredients are mixed and the flour is no longer visible, switch to the dough hook and turn on low for 2 minutes.

  6. Scrape down sides of bowl and spray sides of bowl lightly with cooking oil.

  7. Cover the bowl and place in a warm place for about 1 hour, or the dough may be placed in the refrigerator for several hours or overnight in a Ziplock bag (see recipe notes).

    While dough is rising, make sauce (below) if using homemade. 

  8. Flour a clean surface and remove the dough from the bowl onto the floured surface.
  9. Split the dough in half. Roll out each piece into approximately a 14x8 inch rectangle. 

  10. Spread about 1/2 to 3/4 cup of the pizza sauce down the middle of the rolled out dough. See recipe notes for tips. 

  11. Lay the half of the meat on top of the pizza sauce. 

  12. Sprinkle half of the cheese on top of the meat. 

  13. Using a pizza cutter or knife, starting at the top of the dough and cut 1/2 inch strips along each side. See photos on post. Starting at top again, fold the strips over alternately, ending at bottom. PInch the ends together at top and bottom, tuck under to avoid the dough opening during baking. 

  14. Let sit for 30 minutes. Preheat oven 15 minutes before baking. Set rack on bottom third of oven. Preheat to 375 degrees. If shiny dough is desired, Brush the dough with a beaten egg.

  15. Just before baking, place a cut olive on mummy for eyes. 

  16. Bake for about 15-20 minutes or until golden. The mummy shoudl be golden on bottom and top. Remove from oven, let sit for 10 minutes before cutting. 

Sauce:

  1. Mix all ingredients together in a saucepan and simmer for 10-15 minutes on medium heat. Can be made up to a week before using. Freeze any leftovers. 

Recipe Notes

  • This recipe makes TWO Mummy Stromboli's that feed about 6-8 adults if serving with a side such as salad. Each mummy yields approximately eight  1- 1 1/2 inch pieces. This recipe is easily halved. The recipe can also be made into 8 mini-mummies! 
  • I have used both all purpose and all bread flour (4 cups) in this recipe with great success. Depending on the climate (dry or humid) the amount of water and flour will vary. In Utah, where it is very dry and high altitude, I use 2 cups bread and 2 cups all-purpose flour and the amount of liquid stated in the recipe. In Spain, I use 4 cups of bread flour and about 3/4 cup liquid, and 1/2 cup of sunflower oil. If when mixing the dough it seems too wet, add flour, a tablespoon at a time until the dough is smooth and elastic looking. The dough should not look wet or be dry and floury. If the dough is too dry, add a tablespoon of water at a time. 
  • If you are making the dough ahead, it can be placed in a gallon size Ziplock bag and refrigerated overnight. Occasionally when I have refrigerated this dough recipe overnight, it will raise and break the seal of the bag. If you are concerned about this, split the dough into two pieces and refrigerate in tow gallon bags. Remove the dough from fridge and let sit on counter for an hour before rolling out.
  • When spreading the sauce on the dough, try to keep the sauce in the middle of the mummy. This will avoid issues with the sauce seeping out of the mummy. Also, it is best to not overstuff the dough. It makes weaving the mummy pattern a little more difficult if the dough is stuffed too full.

Monday, December 3, 2018

Healthy Vegetable house


I love this idea, but wouldn't make it--too much work!  If you want to tackle the project, you can get the directions by clicking here on the prakticideas.com webpage.

Friday, December 1, 2017

Pumpkin Crumb Cake


Ingredients
1 (18.25 ounce) package yellow cake mix
1 egg, beaten
1/2 cup butter, melted
1 (15 ounce) can pumpkin puree
3 eggs, beaten
1/2 cup white sugar
1/4 cup packed brown sugar
1 1/2 teaspoons ground cinnamon
1/2 cup white sugar
3 tablespoons butter, softened
1/2 cup chopped nuts (optional)

Directions
Preheat oven to 350 degrees F (175 degrees C). Spray or grease one 9x13 inch pan.

Reserve 1 cup cake mix. In a large bowl, combine the remaining dry cake mix with 1 egg and 1/2 cup melted butter. Mix well, and then pat into prepared pan.

In a large bowl, mix together the pumpkin, 3 eggs, 1/2 cup white sugar, brown sugar, and cinnamon. Pour over crust.

In a small bowl, combine reserved 1 cup cake mix, 1/2 cup sugar, and 3 tablespoons softened butter. Crumble over pumpkin filling. Sprinkle nuts evenly over the top, if desired.


Bake in preheated oven for 40 to 45 minutes.

This recipe is from allrecipes.com and can be found by clicking here

We served this for dessert at our Mission Christmas Zone Conference lunch while serving in Belize.  

Wednesday, November 29, 2017

Layered Christmas Jell-o

2 (3 oz.) packages raspberry Jell-o
1 (3 oz.) package pineapple Jell-o
1 (8 oz.) package cream cheese, softened
2 (3 oz.) packages lime Jell-o
1 (20 oz.) can crushed pineapple
1.     Dissolve raspberry  Jell-o in 2 cups boiling water.   Add 1 3/4 cup cold water and stir.  Pour into a 9 x 13 lightly sprayed cake pan and chill until firm, about 1 ½-2 hours.
2.     Dissolve pineapple Jell-o in 1 cup boiling water.  Beat in the cream cheese until smooth.  Drain pineapple well, reserving juice and add enough water, if needed to equal ¾ cup liquid.  Stir crushed pineapple and reserved juice into pineapple Jell-o/cream cheese mixture.  Gently pour over the firm raspberry Jell-o (I pour it over a large spoon to soften the fall of the liquid onto the firm Jell-o so it doesn’t dig a hole in the Jell-o.  Chill until firm.
3.     Dissolve lime Jell-o in 2 cups boiling water.  Add 1 ¾ cups cold water and stir.  Pour carefully over the firm pineapple layer using the same method with a spoon.  Refrigerate until firm.  At least 3-4 hours or overnight.


I got this recipe from Sister  Jolynne Flake to make for our mission zone conference Christmas dinner.  

Wednesday, October 21, 2015

Halloween Pretzles


Another fun Halloween treat idea from Family Fun Magazine.  

Tuesday, October 6, 2015

Goofy Green Monsters!

You won't believe how easy it is to make these goofy green monsters!
1. Start with purchased vanilla pudding cups or homemade pudding divided into small dishes.
2. Use melted chocolate and a small paintbrush to paint monster faces on the inside of clear plastic cups.
3. Refrigerate until chocolate is hardened.
4. Add green food coloring to vanilla-flavor pudding.
5. Pour into prepared cups, top with crushed chocolate sandwich cookies, and refrigerate at least one hour.

I found this recipe on my Facebook wall. It looks like it comes from Parents magazine.   Someone in the FB comments said this:  "You could also use a permanent maker on outside of cup to draw the faces. I know it's not as crafty, but would work."  Another idea for a breakfast treat would be to use vanilla yogurt, add green food coloring, and put granola on top.

Thursday, December 25, 2014

Lightened Up Sweet Potato Casserole

Ingredients:
2 lbs. Sweet Potatoes (about 3 large or 4 medium)
1/2 cup fat free half & half or skim milk
1/4 cup packed light brown sugar
1 tbsp. orange juice
1 tsp. vanilla
2 tbsp. unsalted butter
1/8 tsp. nutmeg
1/4 tsp. cinnamon

Topping:
1 tbsp. cinnamon
1/4 cup light brown sugar, unpacked
1/4 cup quick cooking oats (or chopped pecans)
1 tbsp. whole wheat flour
1/2 tbsp. melted butter

Directions:
Preheat oven to 350 degrees. Spray a baking sheet with cooking spray. Cut sweet potatoes in half and roast in oven for 45 minutes. Remove from oven & allow to cool slightly. Once cool enough to touch, scoop out insides & place in the bowl of a stand mixer. Beat until sweet potatoes are slightly mashed. Add in 2 tbsp. butter, brown sugar, half & half, orange juice, vanilla, nutmeg & cinnamon. Beat until incorporated and sweet potatoes become a whipped consistency.
Spray an 8×8 baking dish with cooking spray. Pour sweet potato mixture into dish. Set aside.

In a small bowl combine 1 tbsp. cinnamon, 1/4 cup brown sugar, 1/4 cup oats, & whole wheat flour. Whisk together. Add half of melted butter and stir to combine. Spoon topping over sweet potato mixture.

Bake at 350 degrees for 30 minutes. Remove from oven and drizzle with remaining butter. If desired, broil for one minute more to crisp the top, watching closely.

Rachel got the recipe from this webpage:  http://www.macaroniandcheesecake.com/2010/11/lightened-up-sweet-potato-casserole.html
She also said, "I didn't make the topping.  Instead I just chopped up pecans."

Cranberry Sauce with Cider and Cinnamon

2 cups unfiltered apple cider  
2 cups sugar
1/4 cup water
1 cinnamon stick (3 in. long)
2 bags (12 oz each) fresh cranberries

In a medium sized non-aluminum saucepan, combine the apple cider, sugar, water, and cinnamon stick.  Place over medium heat and bring to a simmer, stirring to dissolve the sugar.  Add the cranberries, bring to a simmer and cook stirring occasionally until most of the cranberries have burst, about 10 min.

Let cool to room temperature.  Transfer to a bowl, cover, and refrigerate for at least 24 hours to develop the flavors.  Remove the cinnamon stick and let the sauce come to room temperature before serving.

Rachel got this recipe from her co-worker.  

Sunday, November 24, 2013

Wednesday, October 30, 2013

Pumpkin Pie Dip

A pumpkin dip that is perfect for your next party or after school snack.

Ingredients

15 oz can of pumpkin
1 3.4 oz box of instant vanilla pudding powder
16 oz container of fat free cool whip
1 tsp vanilla extract
1 tsp pumpkin pie spice
1 tsp cinnamon


Instructions

In a large bowl combine all ingredients
Stir until well blended
Cover and refrigerate for at least 1 hour before serving

ENJOY!!

I found this on my fb page by Mary Asbury.  The changes I would make for this is to use one cup of real whip cream (whipped and sweetened with 1/4 c powdered sugar and a 1/2 tsp vanilla added) instead of the cool whip.  

Friday, September 13, 2013

*Grandma's Fruitcake (*Grandma Cula Magnusson)

1 box 15oz. raisins             1 t ground cloves
2 ½ C water                        2 t heaping fresh soda
2 t cinnamon                       2 cubes margarine (I would use butter)
1 t allspice                           2 eggs   
1 t nutmeg                           2 C sugar
1 lb. sliced gumdrops (not black)
3 ¾ C sifted flour                1 8oz. cherries
1 8 oz. candied pineapple   1 C chopped nuts (walnuts) 

Simmer water and raisins together for 10 min. Add spices, soda, margarine—let stand 10 min. Slice fruit and add 3/4C flour to fruit. Add 1 C sugar to wet mixture.  Add 1 C sugar and 2 beaten eggs, then add to wet mixture. Mix everything.  Add 3 C flour, nuts, fruit.

Load 3 greased, floured big bread pans about ½ full. Cook at 300 for 35 min.—then reduce heat to 250 and cook for 45 min.   {watch them—may need to adjust}

Smaller pans: 18 min at 300, then 35 min at 250.

Cool in pans, 5-10 min, then on cookie sheet.

I was introduced to this fruitcake when I married Scott 36 years ago.  It's not your usual fruitcake recipe that everyone jokes about.  Maybe it's the gumdrops.  You'll really enjoy this holiday fruitcake.  If any Magnusson cousin makes this recipe, email me a picture and I'll post it with the recipe.   

Sunday, September 8, 2013

Halloween snacks

Cut bananas in half.  Press in mini chocolate chips for eyes and a regular chocolate chip for the mouth.

Peel tangerines.  Add sliced celery for the stems.

Fun!  My friend had this posted on her Facebook page.

Saturday, July 20, 2013

Frozen Pumpkin Yogurt


1 1/2 cups Greek lowfat yogurt
1 1/2 cups whole milk
1 1/2 cups dark brown sugar
2 cups pureed pumpkin
3/4 teaspoon cinnamon
1/4 teaspoon nutmeg

Whisk all ingredients in a bowl until combined.  Place in container of ice cream freezer and freeze according to manufacturer's instructions.  Serves 10

I found this recipe in our newspaper last fall and cut it out to post on this blog. 

Tuesday, December 11, 2012

Cranberries can be more than relish

Mary Hunt enlightening us on the subject of cranberries:

Did you know that there are 440 cranberries in one pound? And 4,400 cranberries in one gallon of juice? And 440,000 cranberries in a 100-pound barrel? That Americans consume some 400 million pounds of cranberries each year? For sure they are delicious, but there are so many other ways you can use fresh cranberries.

Centerpiece. Start with Styrofoam balls, any size. Cut a bunch of wood toothpicks in half. Stick a pick into the ball so that about 1/2-inch is sticking out. Push a cranberry onto the toothpick until it touches the foam ball. Repeat until the ball is covered, placing the cranberries close enough so the white ball does not show through. Set your cranberry balls on candle holders of various heights, or pile them into a large bowl.

Glitter. In a medium bowl, stir together 2 tablespoons water and 1 tablespoon pasteurized egg white (or one raw egg white) until blended but not whipped. Coat raw cranberries with this mixture. Spread granulated sugar on a baking sheet and roll the cranberries in it until they are covered. Dry at room temperature for 2 hours. Use as garnish for desserts, or eat them plain. Sugared cranberries almost sparkle, they are so pretty.

Garland. Wash cranberries. Thread a large sewing needle with waxed dental floss. Secure the first cranberry on the floss by putting the needle through the cranberry twice, then making a knot in the floss. Continue threading the cranberries until the desired length is achieved to decorate the mantel, Christmas tree or banister.

Fun fact: If you strung all the cranberries produced in North America last year, they would stretch from Boston to Los Angeles more than 565 times.

Flower arrangements. Pour fresh raw cranberries into a clear glass vase. Add water. Now add a simple flower arrangement. The red berries in the water are stunning. Berries will last longer than the flowers, so don't worry about them going bad.
Hint: You don't have to add the water or even the flowers. Clear glass vases filled partially with red cranberries add a beautiful decorator touch to any setting.

Lip-gloss. Place 10 raw cranberries, 1 teaspoon honey and 1 tablespoon almond oil in a small bowl. Microwave on high for two minutes. Mash and stir up the mix. Allow to cool, then use a fine sieve to strain out the goop. Pour the mixture into a small container. Apply to lips as needed for a wonderful moisturizer and exfoliant.

Floating candles. Partially fill a clear glass bowl with water. Add fresh cranberries (they'll float) and floating candles to make a pretty, colorful and simple holiday decoration.

Cranberry sauce. Here it is, the best recipe ever for cranberry sauce: Combine in a saucepan over medium high heat: 1 (12 ounce) package fresh cranberries, picked through and rinsed; 1 1/2 cups water, 1/2 cup white sugar and 1/2 cup packed brown sugar. Cook uncovered for 5 minutes. Spoon off any foam that forms. Serve hot or cold. Yum.

Mary Hunt is the founder of www.DebtProofLiving.com, a personal finance member website. You can email her at mary@everydaycheapskate.com, or write to Everyday Cheapskate, P.O. Box 2099, Cypress, CA 90630. To find out more about Mary Hunt and read her past columns, please visit the Creators Syndicate Web page at www.creators.com.

This was in our newspaper this morning.  And who doesn't like homemade cranberry sauce?  Once again, thanks, Mary Hunt for a some wonderful ideas.  


Thursday, April 5, 2012

Easter Chicks Deviled Eggs

Ingredients
  • 2 dozen eggs
  • your choice of type of mustard
  • Mayonnaise or use yogurt if you like
  • Sweet pickle relish
  • Celery Salt
  • Paprika
  • Part of a can of black olives and carrot slivers
Instructions

Hard boil a couple dozen eggs (or adjust for the size of the group to feed). I always put them in cold water after boiling and then put in the fridge for at least 10 minutes - makes them easier to peel.

Mix together the mustard, mayonnaise, pickle relish, and celery salt. Taste and adjust as needed. Sprinkle some paprika on last. The pickle relish is my secret ingredient and makes them very flavorful - really - try it.

Cut the Tops off the eggs and stuff with mixture. Use black olive pieces for eyes and small slivers of carrot for a nose. Stick the top back on at an angle like a hat to make the eggs look like chicks.

I found this on the Internet and it looked like a fun recipe to post.
http://www.squidoo.com/affordable-easter-presents

Monday, April 2, 2012

Peeps Sunflower Cake

1 pkg (18 1/4 oz.) yellow cake mix
2 cans (16 oz. each) chocolate frosting*
19 yellow chick Peeps candies
1 1/2 cups semisweet chocolate chips
  1. Prepare and bake cake according to package directions using 2 greased and waxed paper -lined 9 inch round baking pans.** Cool for 10 minutes before removing layers from pans and placing on wire racks to cool completely; carefully remove waxed paper.
  2. Level tops of cakes. Spread frosting between cake layers and over top and sides.
  3. Without separating Peeps and curving slightly to fit, arrange chicks around edge of cake to form sunflower petal. For sunflower seeds, arrange chocolate chips in center of cake.
*I would make my own chocolate frosting. You can find the recipe here.
**I would just spray my pan with Pam and not use the waxed paper.

If you are my kids, you would know that I adore Peeps. So of course I love this recipe. I got this recipe out of the April 2012 Reader's Digest Magazine. The article says you can get more Easter recipes by visiting: rd.com/april

I just read a review from tasteofhome.com here and someone posted this suggestion in case you want to make this cake this summer: If you want to make this in the summer, buy the Peeps and freeze them.A few days after Easter you will get them for 75% off!